
When you first get your Privex WebBox™, you can browse to it's IP address in your browser with standard HTTP. For example if your server's IP is 185.130.44.10, you would type http://185.130.44.10 into your browser's URL bar.
If you have an IPv6-only VPS, you'll need to put the IPv6 address in square brackets, for example if your VPS's IPv6 address is 2a07:e00::abc, you would type into your browser's URL bar: http://[2a07:e00::abc]
NOTE: To be able to connect to an IPv6 address such as 2a07:e00::abc, your internet provider must support IPv6, or you must be using a VPN such as AzireVPN which supports IPv6 to be able to connect to an IPv6 address. You can use Privex's What Is My IPv4 / v6 address service to check if you have working IPv6 or not.
You'll be greeted by our custom PHP test page (pictured above), which is a very simple HTML + PHP page that runs a small amount of PHP code to obtain your IP address that you're connecting to the page from, the version of PHP which is running on the server, and the folder where the PHP test page script is contained.
This test page confirms both that the web server (Caddy) is running correctly on your server, and that it's properly configured to work with standard PHP scripts.
Nginx preconfigured for use with PHP (disabled by default, you can easily switch from caddy to nginx if you prefer)
MySQL database server + client (server is disabled by default as it consumes a lot of RAM, and might not be needed)
PostgreSQL database server + client (again, server disabled by default to avoid unnecessary default RAM usage)
Certbot (letsencrypt) for getting SSL certificates when using nginx
PHP 7.3, with php7.3-fpm and php7.3-cli - ready to use
NVM (Node Version Manager) installed into 'debian' + 'root' with NodeJS v12.17 LTS ready to go
Python 3.7.3 with some packages to kickstart deploying apps:
Django Web FrameworkFlask Web Micro-frameworkSQLAlchemy + Flask-SQLAlchemy (common database ORM used with Flask and small python apps)Psycopg2 (PostgreSQL Python Library)mysqlclient (MySQL Python Library)beem - for the hive/steem audience, the main python library for hive/steemredis - the official python Redis libraryprivex-helpers + various extra packages related to it - useful "kitchen sink" Python libraryVarious other random useful things
There are a variety of easy to use SFTP clients (Secure FTP, not to be confused with FTPS which is different), any of the clients listed below will work just fine for managing files on your new WebBox™ - the only real difference between each of them are in the different extra (not important) features they each have, the platforms they support, and their user interfaces.
Pick whichever one you prefer - if you're not sure, FileZilla is one of the oldest and most well known clients, so there's plenty of guides on the internet on how to use it, troubleshooting issues, etc.
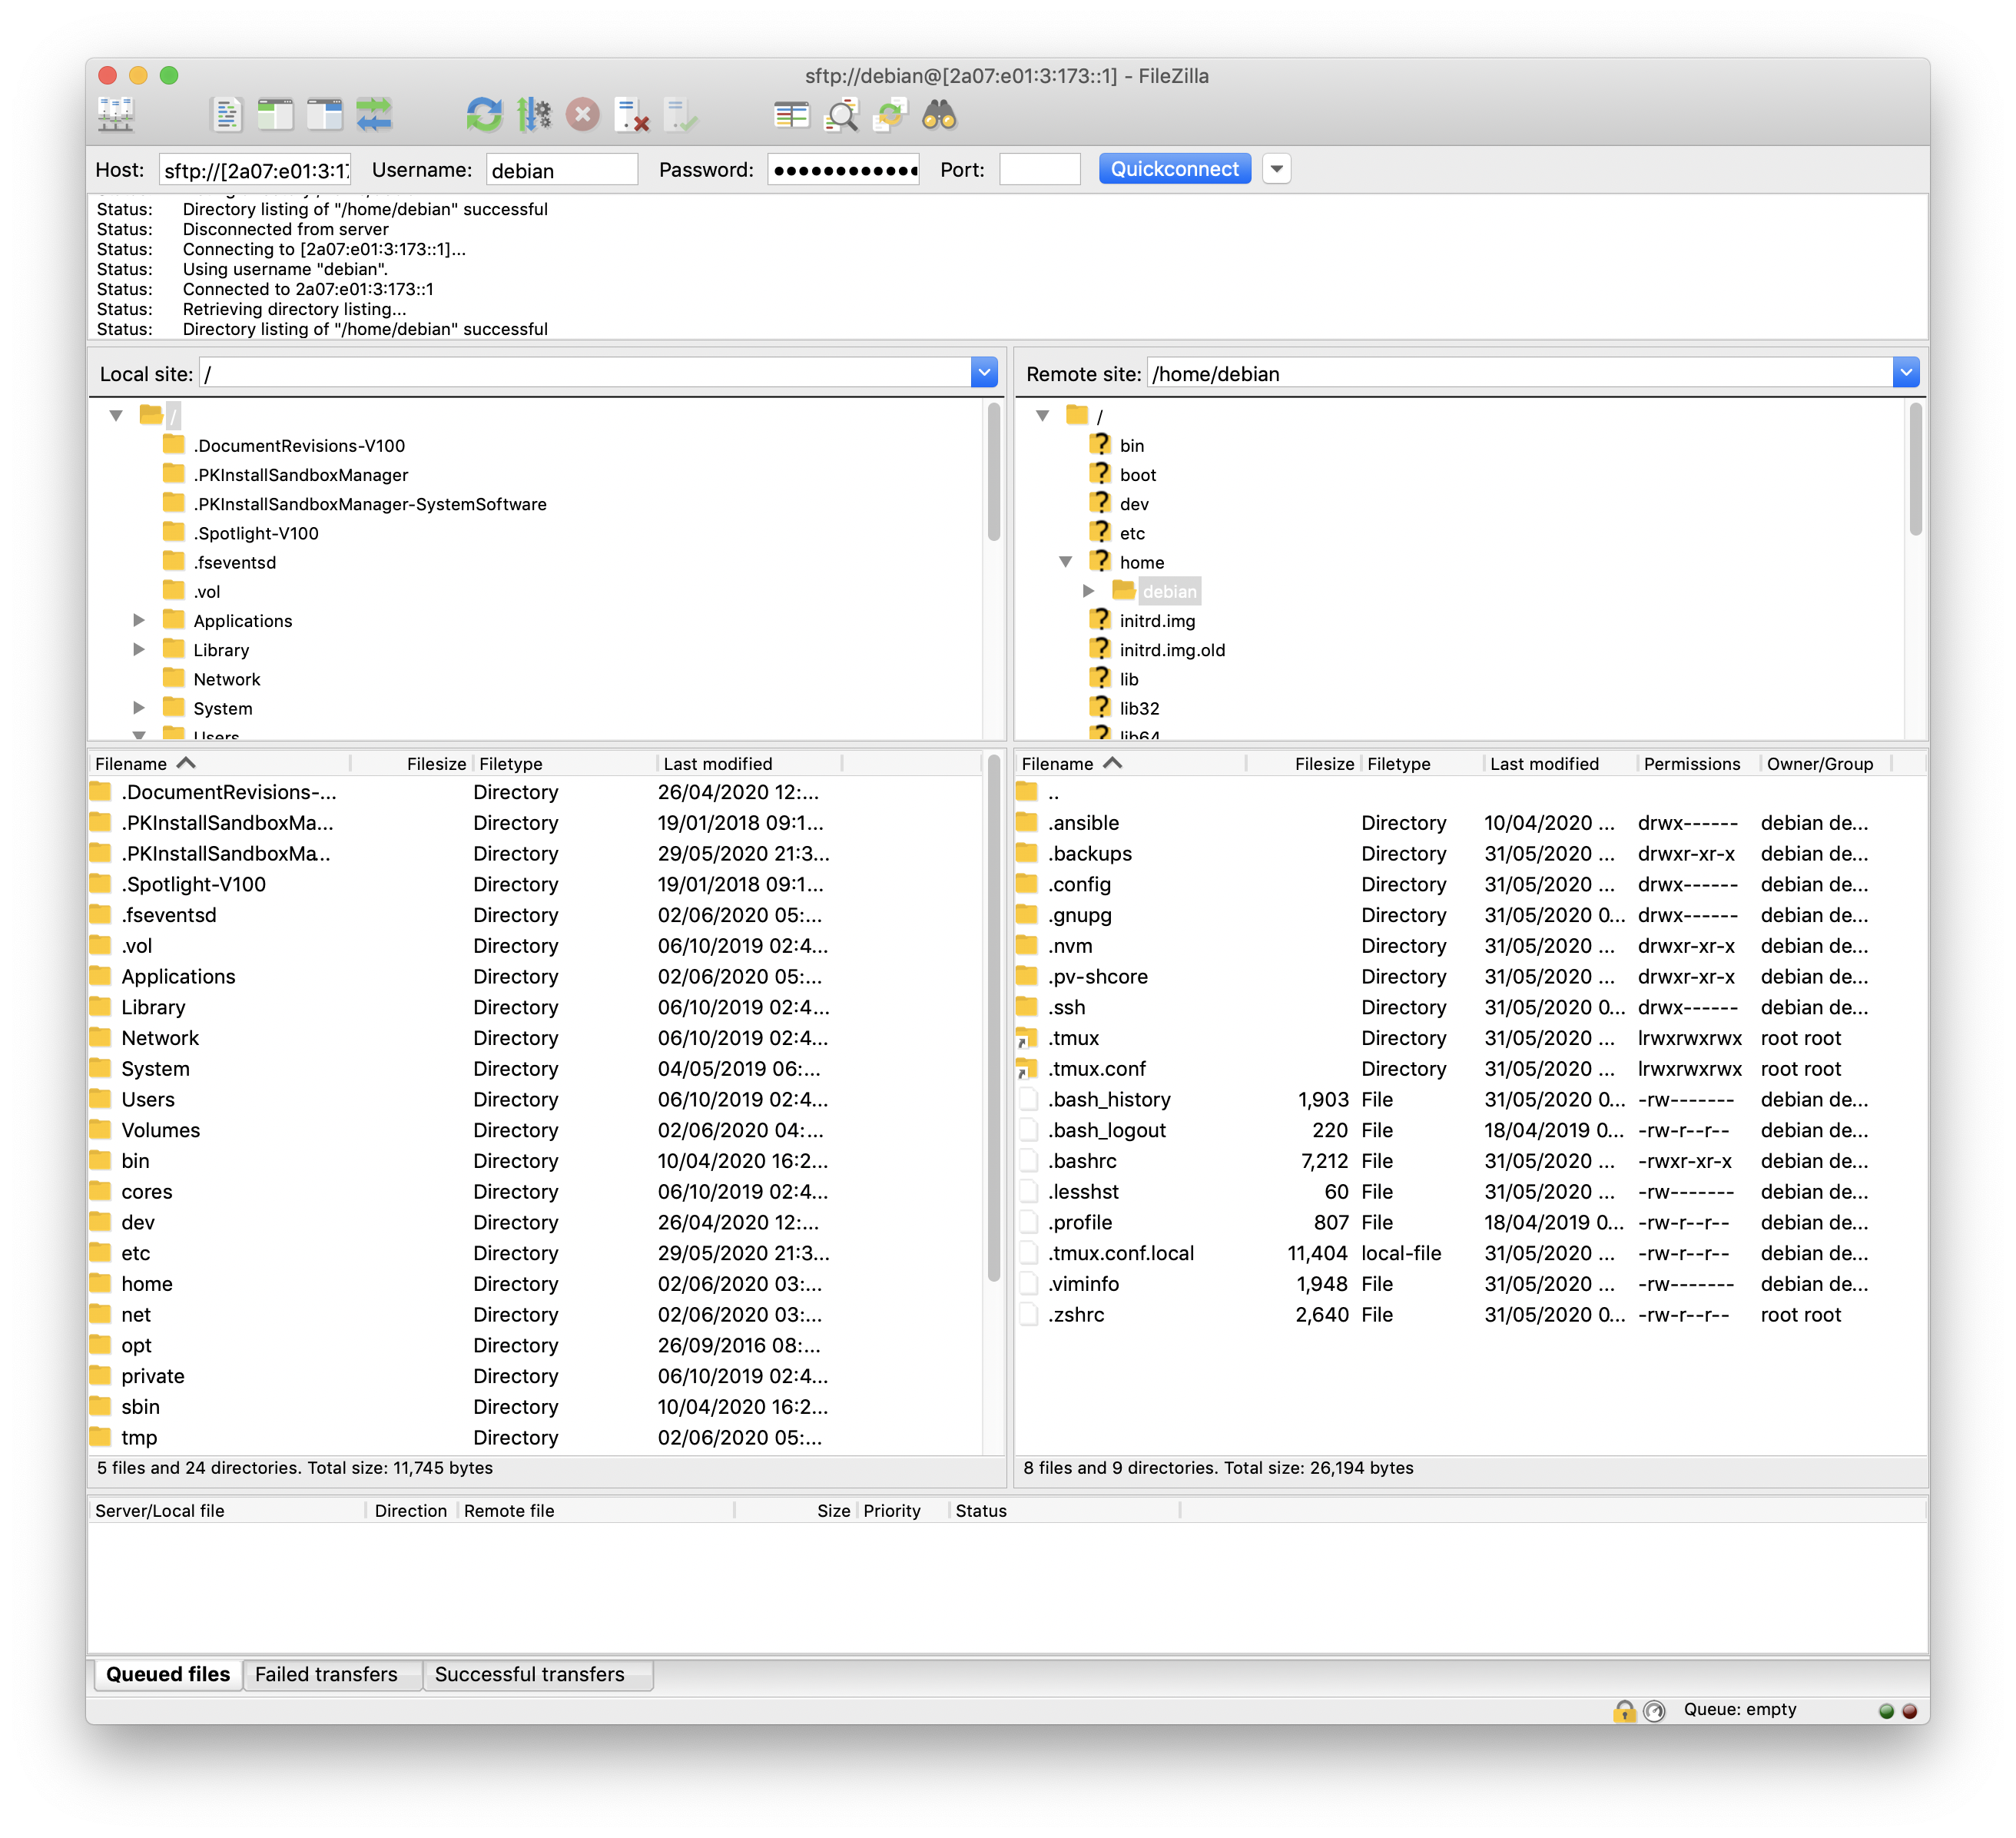
With FileZilla open, enter into the Host box sftp://,
then, if your VPS has an IPv4 address, you can enter that normally, like so: sftp://185.130.44.10
If your VPS is IPv6-only, you'll need to surround the IPv6 address with square brackets [ ] like so: sftp://[2a07:e00::abc]
Enter the username for your VPS into the Username box (by default the username for our WebBox™ VPS's is debian)
Now enter the password for your VPS into the Password box. If you haven't yet changed your VPS password, then your password should be the one which was emailed to you with the rest of your server details.
You can leave the port blank, then press Quickconnect.
You should now be connected to your server, and should see that you're in the /home/debian folder.
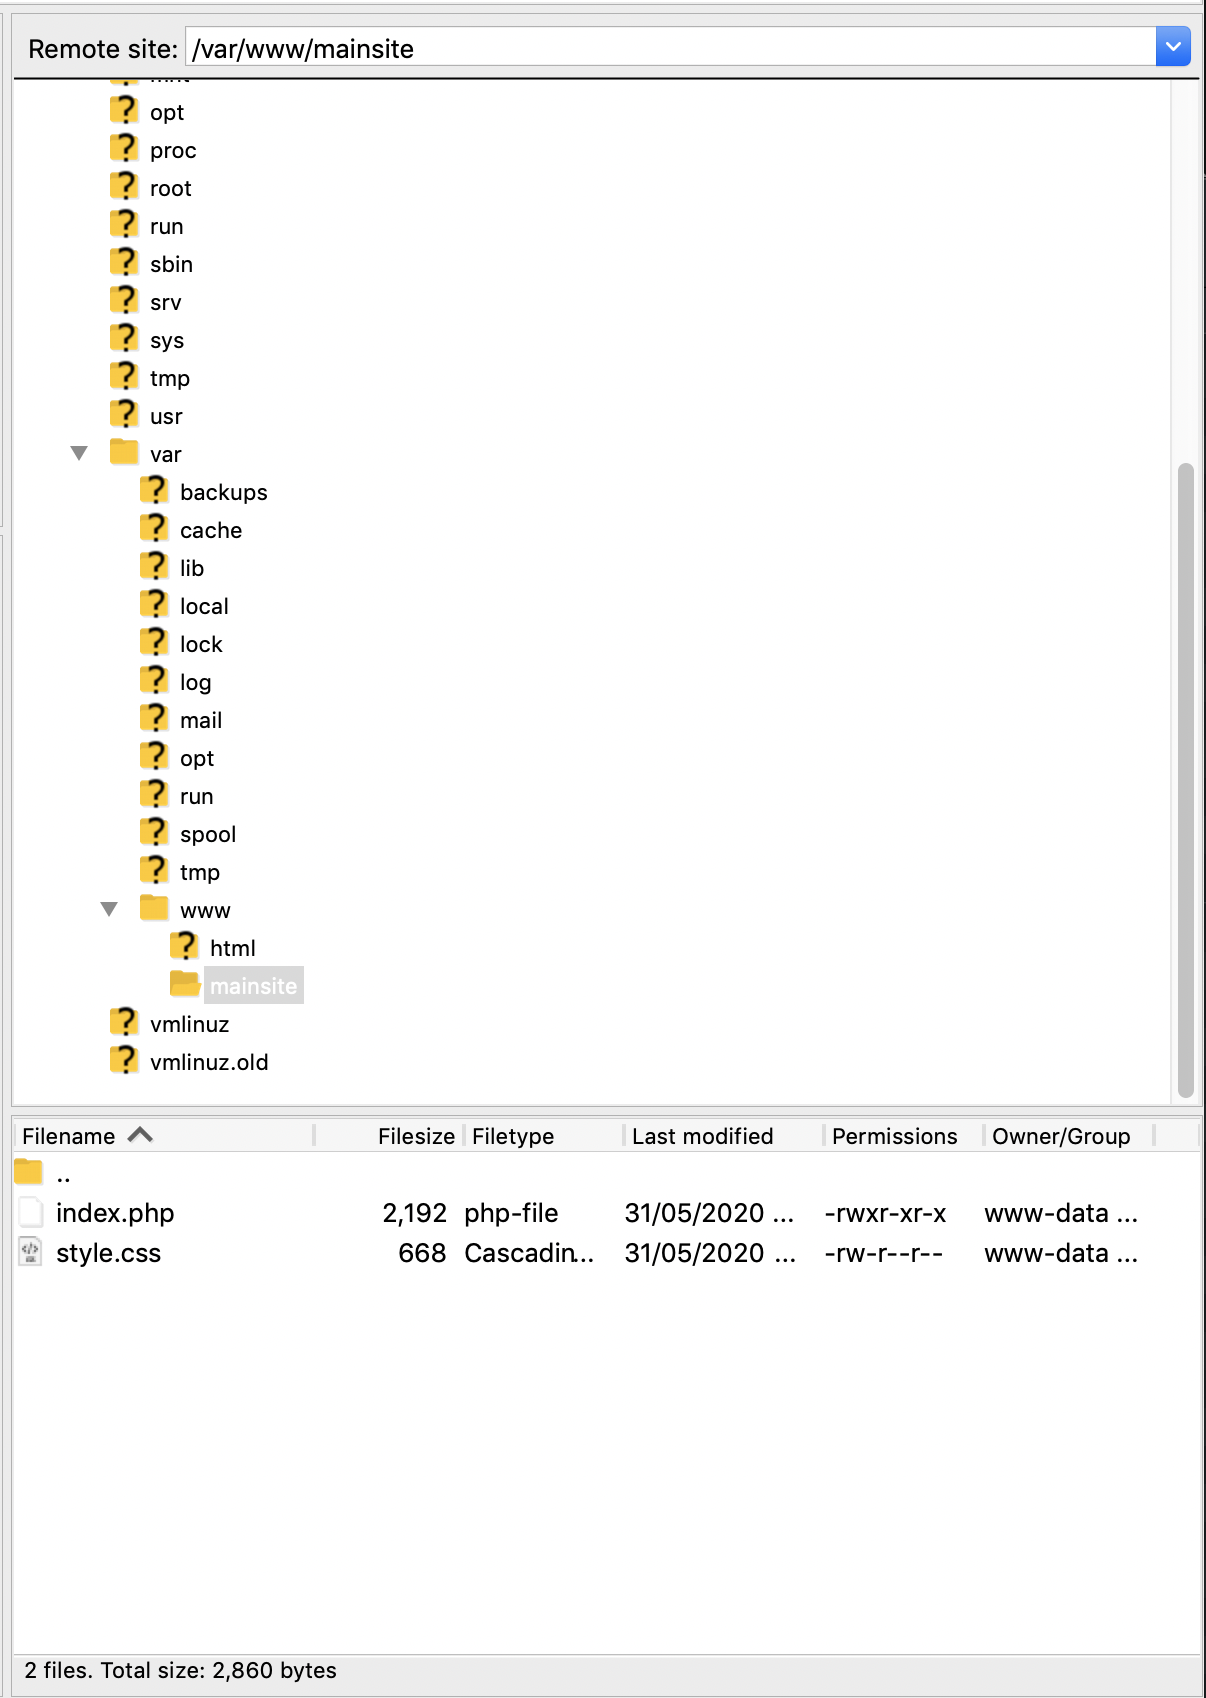
Now that you're connected, you'll want to navigate to the folder /var/www/mainsite, which is the default folder for the main website.
You can do this either by navigating with the mouse through the visual folder tree on the right, or simply entering /var/www/mainsite into the Remote Site text box and pressing enter.
You should see index.php and style.css (there may be additional files if our template has been updated since this article was last updated).
You can delete those two files if you want, or open them up and edit them if you want to use our minimalistic layout for your website :) - it's completely fine to use our PHP test page layout as a base for your own web page, as long as there are no claims on your modified page that we're in anyway responsible for whatever content is on your website. If you want to give us credit however, you can do that, for example The layout / design of this website was based on an example web page made by Privex.io who we are not affiliated with.
You can use the left panes of FileZilla to browse your local PC and locate the files that you'd like to upload to the web server. Once you've found the file(s) you'd like to upload, simply drag them with your mouse from the left browser pane into the right browser pane (the one with index.php and style.css). You can also right click on the files on the local browser pane and click "Upload".
First, log into your domain registrar (or if you use an "anti-DDoS" / "web firewall" service like Cloudflare, log into that).
Find the page for managing your domain's DNS records.
Create a new record. If you want to point your base domain, e.g. example.com at your server, on most registrars you'll need to enter @ into the Name or Subdomain field. This varies
by domain registrar, so please contact your registrar for more guidance on how to use their specific system.
If your VPS has an IPv4 address, create a new record with the type A and in the "content" or "value", enter your VPS's IPv4 address (looks like 185.130.44.10). Save the record.
If your VPS has an IPv6 address, create a new record with the type AAAA and in the "content" or "value", enter your VPS's IPv6 address (looks like 2a07:e00::abc). Save the record.
NOTE: If you have a Swedish WebBox™ which has an IPv4 address, it very likely has an IPv6 address too. If you have both IPv4 and IPv6, then you should add both an A and AAAA record.
NOTE: It may take anywhere from 30 seconds to 24 hours for your newly added domain records to work. If your domain doesn't seem to be working, wait 5-10 minutes and try again after that. If it's still not working after 10 minutes, you should contact your domain registrar for clarification on how long it will take, or whether something is wrong.
Open up your domain in your browser by typing it into the URL bar, for example if you've pointed the domain example.com at your server, type http://example.com into your URL bar and hit enter.
You should now see the PHP test page, just like when you visit the IP address of your server directly (unless you've edited / replaced the test page with something else).
If you get a browser error such as "Server not found", it's usually due to the new domain records not being propagated yet. If your domain still isn't working after about 10 minutes, please contact your domain registrar for assistance.
Once you've confirmed your domain is working correctly, you can move on to the next part.
Connect to the server via SSH (linux terminal).
Enter the following command to open the Caddy config in a simple text editor (nano):
sudo nano /etc/caddy/Caddyfile
(NOTE: The command is CASE SeNSiTiVe)

Use your arrow keys to scroll down to the section containing these lines:
:80 {
    # Set this path to your site's directory
    root * /var/www/mainsite
Replace :80 { with yourdomain.com { - as shown in the above screenshots.
Press CTRL-X to exit nano, hit y to save changes, hit ENTER when prompted for the filename (it's already filled out).
Now type the command:
sudo systemctl restart caddy
Wait about 60 seconds before continuing to the next step, to give Caddy time to check your domain and obtain a test SSL certificate.
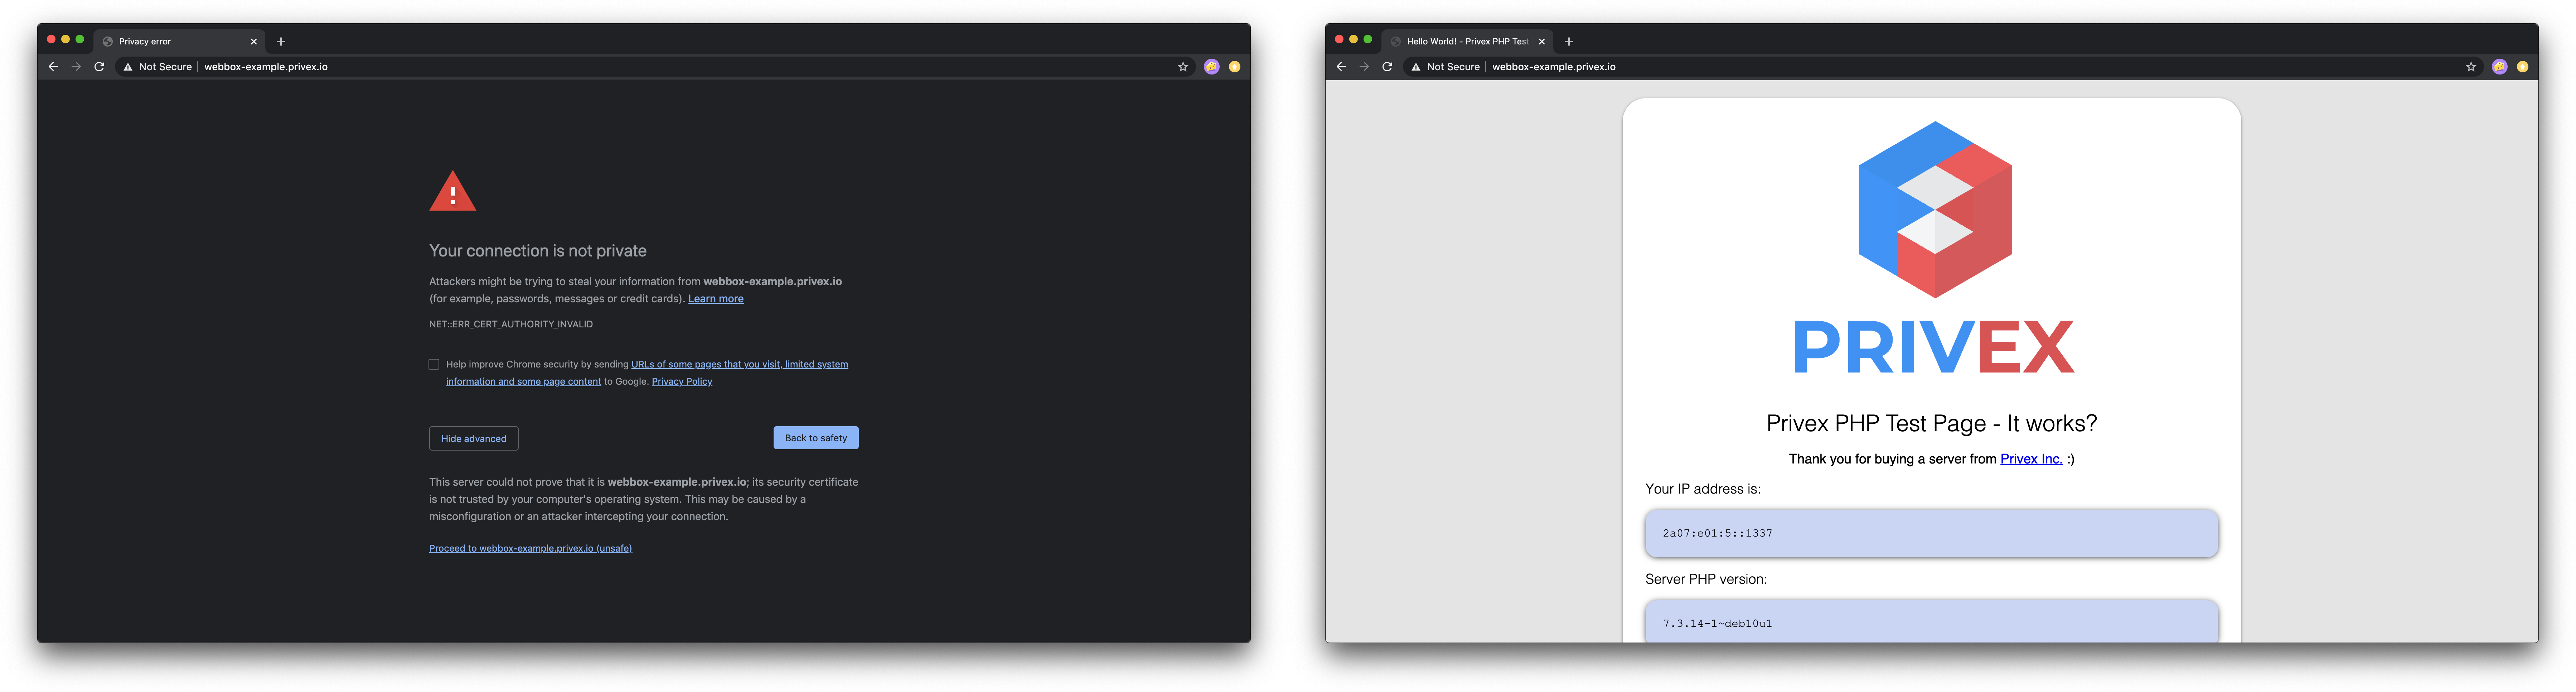
After you've waited 60 seconds, go to https://yourdomain.com (notice the https - very important)
You should get a warning about the SSL certificate. If you do, then it means that it's working correctly.
In most browsers, you can find an option to ignore the warning and continue to the website under "Advanced" or something similar. Go ahead and do that.
You should see the PHP test page again (unless you replaced it), showing that SSL is working, as it's properly serving the web page.
Now that we know the domain was setup correctly, and that Caddy is able to obtain an SSL certificate without any issues, we can change Caddy to use the REAL "ACME server", allowing it to get a normal SSL certificate which browsers won't complain about.
Open up the Caddy config again:
sudo nano /etc/caddy/Caddyfile
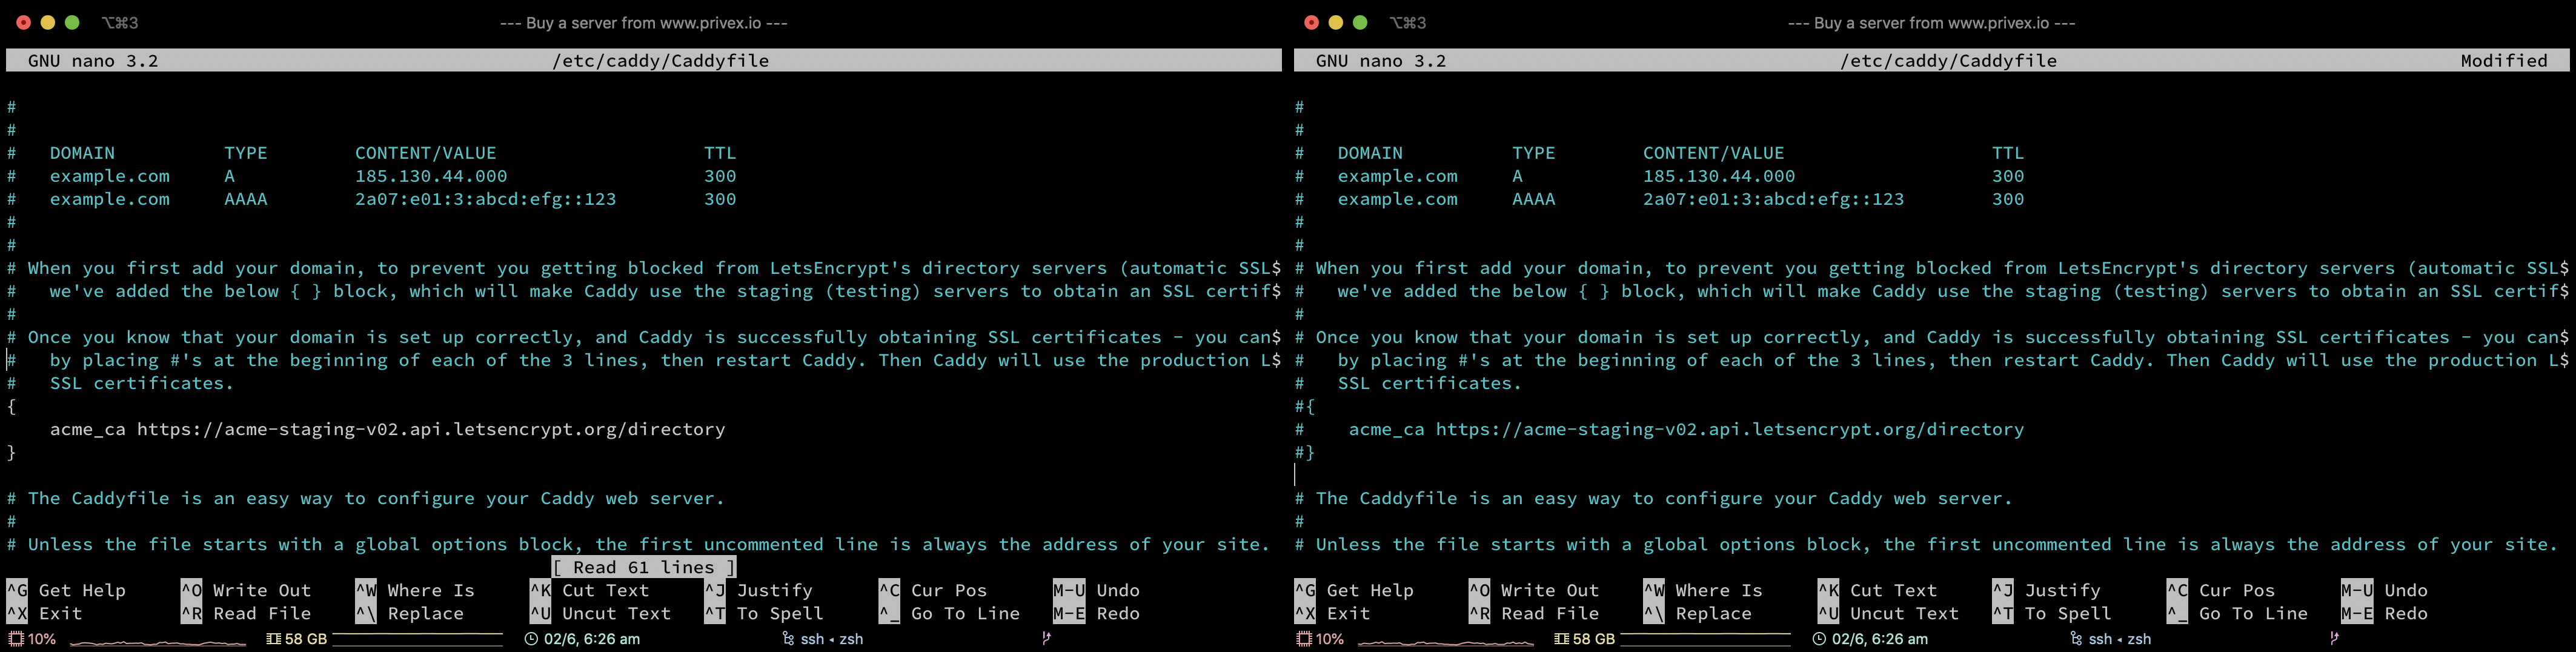
Find these lines (see screenshot above), and place a # at the start of each of the three lines:
{
    acme_ca https://acme-staging-v02.api.letsencrypt.org/directory
}
Press CTRL-X to exit nano, hit y to save changes, hit ENTER when prompted for the filename (it's already filled out).
Restart Caddy again:
sudo systemctl restart caddy
As you did earlier, you'll need to wait 60 seconds or so, to give Caddy time to obtain a real SSL certificate for your domain.

Once you've waited 60 seconds, close the previous tab with the "insecure" SSL page open (this is required to make most browsers re-request the SSL certificate).
Now, navigate to https://yourdomain.com again (remember the https), and you should find that your browser no longer complains
about SSL issues, you should also see a "lock" icon in your URL bar (usually on the left hand side), indicating that SSL is
correctly set up :)
If you've made it this far, your domain is now correctly pointed at your server, your server is serving PHP-enabled web pages, and your visitors will have a safe and secure connection thanks to fully functional SSL :)
Now you can move on to actually setting up your website or web application! You're all ready to go :)
Phew.
If you don't feel comfortable with the Caddy web server, you can disable it and switch to Nginx, which is also pre-configured to work with PHP out of the box, with our test page.
You'll need to connect to your server via SSH, and run these commands:
sudo systemctl stop caddy
sudo systemctl disable caddy
sudo systemctl enable nginx
sudo systemclt start nginx
You can type the following commands to verify that Caddy has been stopped + disabled, and that Nginx is enabled + running:
sudo systemctl status caddy
sudo systemctl status nginx
If you browse to your server's IP again, you should be greeted with our PHP test page again (or your website, if you replaced the files in /var/www/mainsite
The well known database server MySQL is pre-installed on our WebBox™ servers, however it's disabled by default as it consumes a lot of memory.
(more specifically, MariaDB - a fork of MySQL which is fully backwards compatible with applications that work with MySQL)
It's very easy to enable and start with two simple commands via SSH:
sudo systemctl enable mariadb
sudo systemctl start mariadb
To access the MySQL SQL console so that you can create databases, users, and tables etc., run the following command to connect to MySQL using the default root user with no password:
sudo mysql
We also include the other popular database server PostgreSQL - it's disabled by default just like MySQL, but is just as easy to enable again.
It's very easy to enable and start with two simple commands via SSH:
sudo systemctl enable postgresql
sudo systemctl start postgresql
To access the Postgres SQL account so that you can create databases, users, and tables etc., run the following command to log into the postgres Linux user account:
sudo su - postgres
Once logged into the Postgres account, you can create a postgres database user like so:
createuser -SDRl -P someuser
To create a database somedatabase owned by someuser:
createdb -O someuser somedatabase
To open an SQL console for the database somedatabase:
psql somedatabase